Showing posts with label Baby Shower Projects. Show all posts

Sunday, December 11, 2011

SR-W50: "Occupy Sewing Room" Challenge


I cannot believe how completely tickled I am by my progress through the "Occupy Your Sewing Room" Challenge!  Neither my WIP list nor my Stash Report ever looked so good!  I did end up having to spread out my time a little bit because of my pregnancy I get quite tired these days.  My husband helped me rearrange my sewing room a little bit to make it easier to put a big comfy chair in there.

Things Finished:

1 secret project (I will show in a few weeks along with a tutorial) and...

11 burp cloths completed, 2 hour-glass pot holders (experiment w/ loop placement)
"Melting Rainbows" Wall Hanging
Christmas Colors- Wonky block pot holder

Quilt tops finished, but projects not completed:
2 quilt tops in yellow/grey/white/black should measure about 50'X 55"
Quilt top with a modern try at the pinwheel twist Should measure about 60"X 60"

So here's the much, much happier verdict this week:

Busted this Week:                  08.75 yards (not counting the quilt tops yet)
Busted from 08/01/2011:       215.50 yards
Stashed this Week:                00.00 yards
Stashed from 08/01/2011:       95.5 yards
Net Busted for 2011 (from 08/01/2011):  120.00

Thursday, November 17, 2011

TGIFF3: "Put Your Records On..."

Welcome to Friday!  I have the record player on today listening to some of my favorites and taking inventory of the week!  A very sweet friend came over this week to help me sort through some boxes and get them labeled in anticipation for our move in the Spring.  I decided to pack all of my scrapbooking materials and most non-sewing craft supplies as well.  Unfortunately I was discouraged to discover several WIP/UFO's scattered through out random storage boxes that have now been identified and put on my "WIP list" over to the right side of my blog.

Continuing to have energy, I am trying to blast my way through as many projects hidden in my "WIP Pit of Despair" as I can.  That includes the blue/white girls dress (size 2) to the left.  It was a project I started over 3 years ago, sadly enough it just needed a little hemming, buttons sewn on, and I thought it needed the snazzy little scrap fabric flower I made from this tutorial.  The flower is the 2nd item I have actually made from my "Pinterest boards!"

Finishes Since last Friday:
1.  9 blue/green/yellow Modernish mug rugs
2.  Table topper in blues & cream
3.  Blue Plaid Girl Dress (Size 2) & snazzy flower
4.  6 Spirit Scrap bibs w/ yellow ties


New projects (since last Friday)- 19
In progress - 35 (Found a few more in boxes, sigh)
Finishes (Since last Friday)- 17
So, linking with Thank Goodness It's Finished Friday (TGIFF) being hosted this week at Bending Pins!
and Amanda Jean is back with Finish it up Fridays over at Crazy Mom Quilts!

Wednesday, November 16, 2011

WIP: "The Flight of The Bumble Bee..."

I am trying so hard not to tear into the new fabrics I spoke about on Monday to get working on Nugette's quilt (don't forget to check out her naming contest).  Plus I still have a few more Christmas presents to try to get done by Friday's TGIFF linky party!  The picture in the upper left hand corner starts off today's WIP list with the Ticker Tape Wall hanging a new addition for this week!  My belly and I are getting the background spray basted in preparation (with a mask, don't you worry),  I added a few pins just in case.  I did add my baby bump, we call her "Nugette," to my WIP list on my side bar this week, she has been counted in my numbers since I started, but someone pointed out she should be on the list!

I have 12 more Christmas Projects that I started this past Saturday, but I was able to finish 9 of them on Monday evening Post, but now I need to get them gift wrapped with the Hot chocolate mix that I make-up every year for gifts (and personal consumption of course!).  I am gifting them in tea tins and then plan to wrap the whole bundle in plastic & ribbons.  [I plan to share the recipe for the hot Chocolate mix next Friday when I am hosting my first TGIFF linky party!]

I do have 4 more "Mug rugs" to complete.  I only have one left to do for Christmas and then the other three I plan to use as prizes for my baby shower or maybe as birthday gifts this spring, I really haven't made up my mind yet!


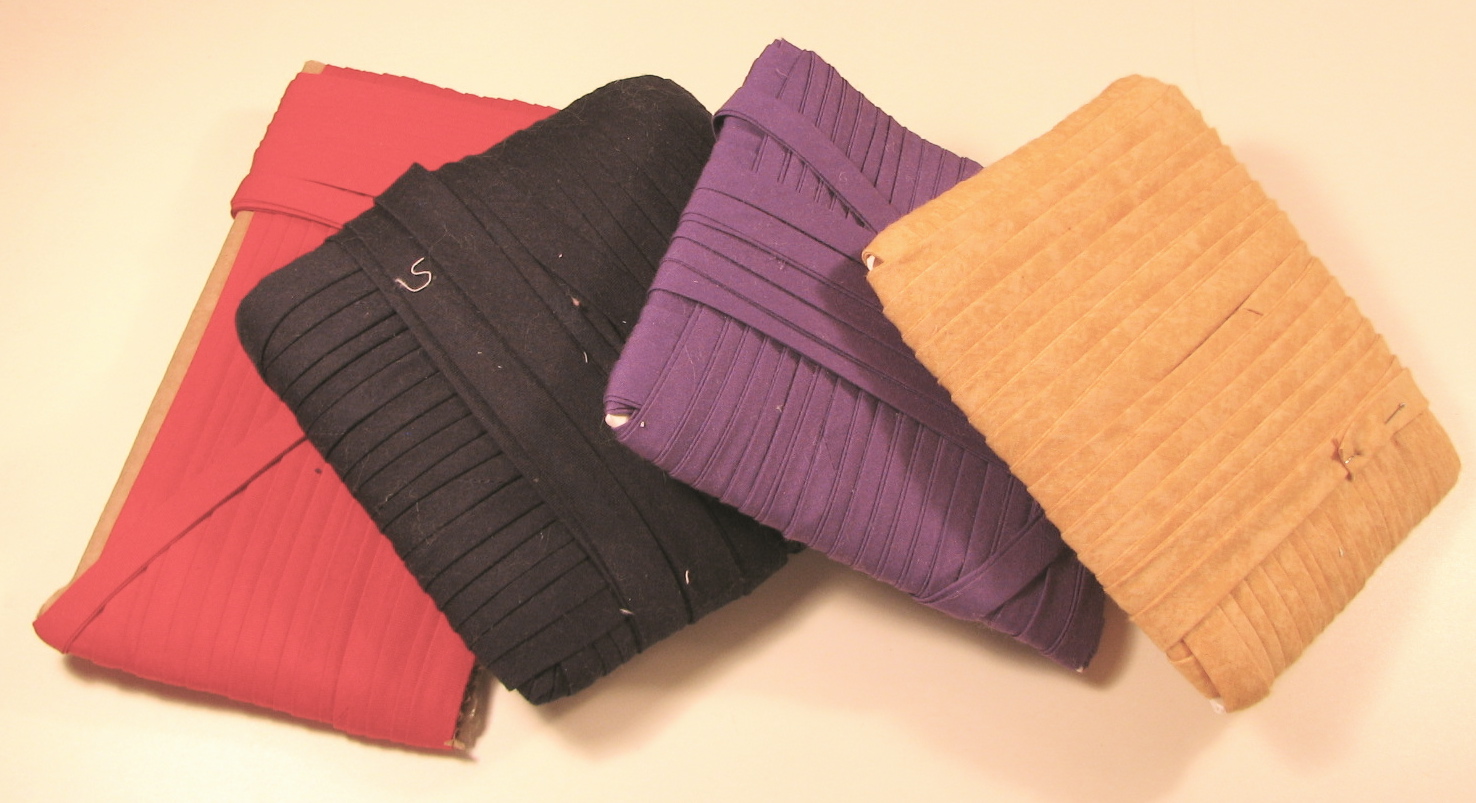
I also started another 6 baby bibs, some of which I plan to give for Christmas, some are for the Spring Baby Boom (I have 7 friends due within 3-4 weeks of myself!) which I intend to pair with a burp cloth for a little set.  Since almost all the babies are little girls or supposed to be, I pulled out Tula Pink's Spirit fabric from my Moda scrap bag collection.  A friend walked into my craft room the other day and exclaimed over my large bundle of bias tape, which is what I like to use on my bibs that tie;  I made it.  Yes, I was crazy, and spent many hours when we were back home in the Alaskan winter evenings cutting and ironing strips to make a million yards of bias tape!  I have to say in part it was so worth it because in the 3 years we have lived here I have only run out of one of my bundles, the green one of course!

I also found more UFO-WIP's from some storage boxes which has grossly inflated my WIP count!

So my WIP's this week are:
New projects -22 (Since last Wednesday)
In process - 42 (Found a few more in boxes, sigh)
Finishes - 16 (Since last Wednesday)


For another happy little finish, we have for your viewing pleasure a nice little blue table-topper I made for one for one of the end tables in my living room (I hate to dust)!  I have plans to make a second one to match for the other table.  I know I said I wasn't going to make anymore items for our household, we have plans to move in 6 months, but I have plans to bring these end tables with us!  Plus it was already started so I was trying to get it off my WIP count (that's my story and I'm sticking to it).


Linking up at these places this week:WIP Wednesday at Freshly Pieced

Thursday, November 10, 2011

TGIFF2: Swept Off My Feet...

I got it finished!!!!  I took the purple/green table runner to class with me on Wednesday night and got the binding hand-sewn by the end of the evening!  I was very proud of myself on this table runner because I used some straight quilting, which may sound strange but 98% of my quilting has been stippling for the past year.  I ran out of batteries so I was not able to attempt a few more shots as I usually do.

I am also able to add the two fall mini-quilts I finished on Tuesday, the reversable baby shoes finished today, a set of 3 vinyl bean bags with a little carrying box/bag (I also thought it could be used for tossing them into) and one of the dresses I cut out on Tuesday for Christmas presents.


I was going to try to get more projects done but I ended up twisting my ankle (trying to find a battery).  I now have to spend some quality time with my feet up (somehow being 6-months pregnant magnifies this in my husband's mind)!  I have several more Christmas presents to get started and finished so I can ship next Friday, so this will be a very busy upcoming week!


New projects (since last FIF)- 4
In progress - 17 (Getting the numbers down!)
Finishes (Since last FIF)- 6
So, linking with Thank Goodness It's Finished Friday (TGIFF) being hosted this week at Quilt Matters!


Wednesday, November 9, 2011

WIP: I Just Can't Help Myself...


Welcome WIP Wednesday!  I am excited this week to get some things accomplished and more things finished.  Number one on my list, you would think, would be the Purple/Green table runner.  The binding is sewn on the one side, binding clips are on and now it's ready for me to hand-sew.

However, I am having such energy this week I had to get some other projects pulled out from my WIP/UFO bin, not mention I did the unthinkable, I started some projects for Christmas presents.  Everything is ready to make some bean bags and 3 dresses, all of which I hope to mailed off before Thanksgiving.


So my WIP's this week are:
New projects -4
In process - 23
Finishes - 10


But wait!  There is more! I have two finishes already for this week as well.  From my WIP from last Wednesday I not only finished the fall mini-quilt, but also a second fall mini-quilt that I had already cut out for my Mother for Christmas (I can say this online because my mother doesn't have internet and will never see this post).  So along with my 8 finishes last Friday that brings my total up to 10 finishes from last Wednesday.  Check out TGIFF for Thank Goodness It's Finished Friday, it's quite a fun group, you should look into joining and showing your finished projects!


Linking up at these places this week:
Fresh Poppy Design
WIP Wednesday at Freshly Pieced

Friday, November 4, 2011

FIF2/TGIFF 1: "Arms Wide Open..."

I was up early, very early, about 3:30am to be more descriptive.  Listening to the sounds of traffic through an open window, I am feeling homesick.  Even after 3 years I just can't get used to the view, the weather, the culture change, and the lack of not only air but room to breathe in that fresh air.  It is hard to imagine that our little girl-to-come will most likely never know what the difference is in locations. Oh she will see the pretty pictures and hear the stories, but to her this will be her home, her normal.
Juneau, Alaska (Home)
On a positive note, I got a few projects done!  In the semi-quiet morning (we are talking downtown Dallas here, quiet is relative), I went to work on quite a few more baby gifts that I have had in the works and most are overdue to be honest, but hopefully that will be forgiven when they are received.  Three sets of bibs and burp cloths finally completed for Natalia, Hannah, and Elliott; now they just need to be delivered or mailed this next week!  I am hoping to start some projects before my friends have their next batch of babies, especially since I know of 7 friends who are due within 3 weeks of me!  I think I just might be a little busy to start anything if I wait until after they are all born.


 Having been sick this week I also dug up a project I started a while back that I could do on the couch while watching a movie.  I finished it up just yesterday and added the initial and word art yesterday afternoon, and finally got it delivered last night to the two month old little Luke.  I had a wonderful time chatting with with my friends about their transition to parenthood and some of their own advice for my husband and I to consider.  (Further note on 11/04/11:  Blanket is knitted from all cotton yarn usually used in making dish clothes)

And finally a project that I am simply amazed got completed.  I started this bib about 5 years or so ago when my sister-in-law was pregnant with her first child.  Waiting to find out the gender of the child, one bib was made for a boy, this one was started, and then stopped when we were told she was having a man-cub.  When digging through my scrap/project bin I saw this yesterday and thought it would be perfect for my own little girl to use and all I needed to do was add the binding to make it complete!  As you be able to tell by now I did not complete my Projects from this week's WIP Wednesday post, but I don't think I did too bad overall.  The fall mini-quilt will definitely be done for next week though!

New projects (since last FIF)- 3
In progress - 21 (Yes I am tempted to start more)
Finishes (Since last FIF)- 8

I'm usually linking with Crazy Quilt Mom for FIF (Finish It Up Fridays), but she is taking time off.
So, linking with Thank Goodness It's Finished Friday (TGIFF) being hosted this week at Quokka Quilts!

Friday, October 28, 2011

Finish It Up Fridays: My First Week!

A few months ago I ran into a contest challenging us to finish up our works in progress.  It was quite an incentive for me to work on my projects, not so much for the winning a prize, but rather it felt like I had an obligation to finish something even if it was only a couple projects a month.  I've gotten out of the habit of following blogs (I actually had put it in my schedule for an hour, 2 times a week), which has led to my being less reliable in my own blog postings.  My reasons for blogging was to have a way to express myself (this was especially important this past spring when I was home-bound) and connect to the outside world, even if its the small world of quilting and crafting.  

This past week as I attempted to get back on schedule I read a post from a site I recently started to follow called, Crazy Mom Quilts.  She recently started an encouragement for readers to work on finishing projects.  So each Friday I will post what I have finished for the week and upload my link to her website.  You should stop by there and see all the other projects linked by others.  Some I am simply amazed by what I am seeing and it puts a fire within me to get moving on something each week.  My first "finish" for this week is a set I made for my friend's Baby shower of a bib and a burp cloth for her coming little boy.  It is true that I have been making a lot of baby shower gifts lately, and the trend will continue in the foreseeable future as everyone I know seems to be procreating these days!  My second "finish" would be the table runner I wrote about on my Tuesday blog post this past week; it's a belated birthday gift for my MIL.

My goal for Saturday is to get my fabric stash finished being ironed, organized, and yardage counted!  On Monday I hope to post my very first official Stash Report, and share with you my ideas for how I plan to start using these wonderful gems!  See you Monday!

Tuesday, October 11, 2011

WIP: A bunch of little things are getting done!

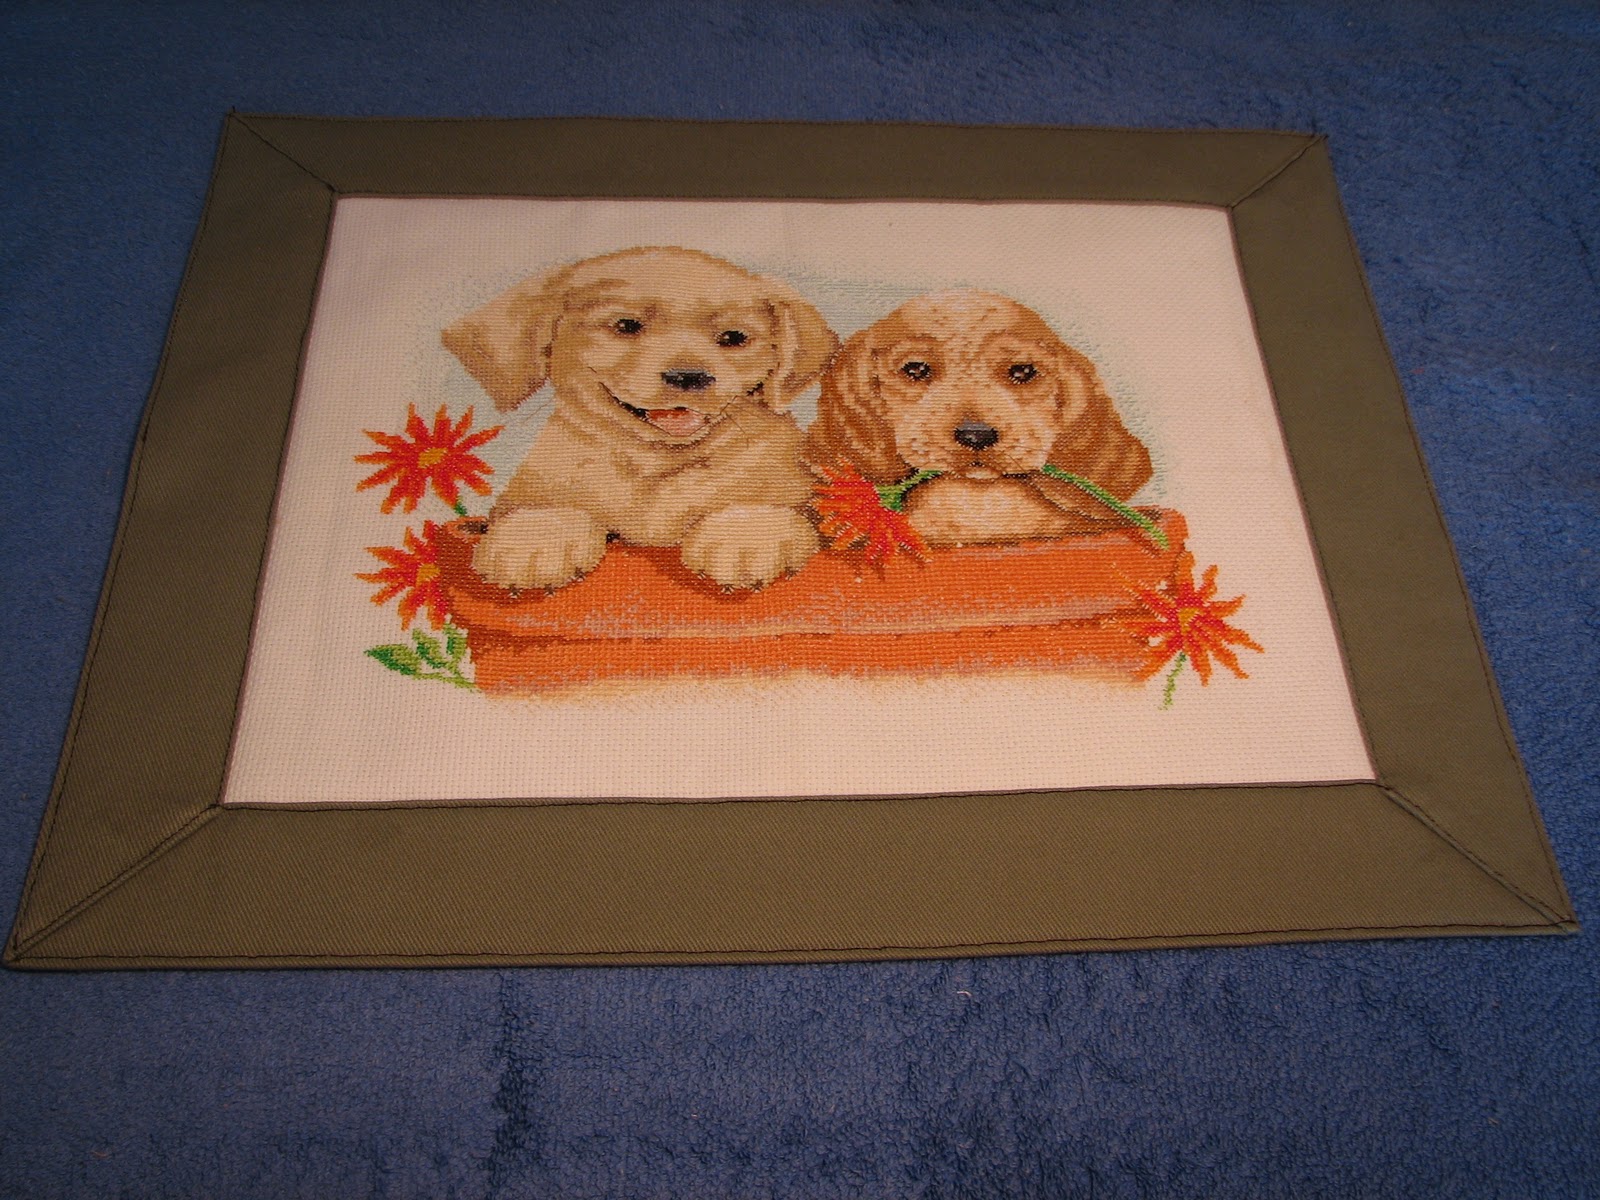
 I have been working on a few little projects that I have been wanting to get done.  The first two are cushioned frames for my friend G's two cross-stitches.  She does truly great work; it makes me want to take up cross-stitching again!  G made me a fantastic trade deal in exchange for my sewing she gave me some gdiapers her daughter outgrew!   I am super excited because it was what my husband and I have decided to use for our baby (We have allergies to traditional disposables in both of our families).


I also have a bunch of friends/family who have new babies or babies on the way!  I have been using these cute colored pre-folds to make various burp cloths.  I had a girl pack with dark pink, light pink, and a medium purple.  The boys' pack included dark blue, light blue and a lime green.  Since more of my friends are having girls (not all of them like pink) I have gotten a little creative with using other color choices.  I forgot to take pictures of the burp cloths I have made over the past couple weeks, so some went off to the mommies with out me recording them, oh well!

I also made a "baby scrubby" for lack of better words.  It has "minky" fabric on one side, flannel on the other, 3 layers of batting and an elastic band to keep it on your hand while washing a child.  My friend "K" has a little girl coming soon that will has some health issues and I was trying to come up with items I thought might help.  I wish I had been more creative, it just doesn't feel like enough.  When I have made a few more of these I will show you how I made the "scrubbies".  I made two other burp cloths (not pictured), I am in the middle of 3 more.  They are great little projects that I can start on my machine and then hand sew the binding on while resting.

On my 4 commission projects:  I am super excited because I finally found the perfect fabric for one of them that has been troubling me (one other time I had the "perfect" fabric picked out and it sold out before I could buy it).  My husband is going to help me spray baste the foundations for a funky Modern pieced wall hanging (#2).  I am deliriously happy that I truly found the perfect pattern in two magazines that just came out a couple weeks ago for #3 & #4.  My husband let me camp out at Joann's for 3.5 hours while he was at work one Saturday.  I will show you more as I get these pieces together!  We are getting further into "Iron Fabric 2011" and my dreams of organization, its slow but steady.  I will post a picture soon to show you an update on my Fabric Stash project!

Wednesday, September 7, 2011

A Tumbler Quilt Top Tutorial

A tumbler quilt can be a quilt quick project that gives you a little more variety than a simple square-to-square quilt.  You can purchase a special ruler that you can use to cut your pieces, but I will also show you how you can make your own template.
Tools needed for this project:  an iron, an ironing surface,  hand-sewing needles, machine needles, thread, bobbins, scissors, rotary cutter, a rotary cutting mat, a cutting ruler, a pen/pencil, cardboard measuring 5 in. X 5 in., fabric in proportions listed for this project, binding clips (optional), and sewing gloves (optional).
Fabric needed for this project:

1.  1 (42-pieced) charm pack-prints or various prints cut to measure 5in. X 5 in. (41 blocks needed in all).

2.  1 (40 or 42-pieced) charm pack-solid or 3/4 yard of a solid or small print fabric for Main blocks.  (Note: Directions for cutting fabric yardage will be listed in project details).

3.  1/2 yard of coordinating fabric for Binding

4.  1 1/2 yards of fabric for Back

Note:  2 3/4 yards of fabric total for Main blocks, Binding, and Back fabrics if you would like to use the same fabric.

5.  3/4 yards of fabric for the Sashing; this fabric should be different than the other fabrics to show a nice contrast and frame the patterned blocks.

6.  A package of crib-sized batting or a piece of batting measuring 45 in. X 55 in.

Preparing the template:

Step 1:  Mark the pre-measured and cut piece of cardboard 1 inch from the left side inwards.
Make the same mark 1 inch from the right edge.

Step 2:  Make a line with a pen or pencil from the left bottom corner to the  mark one inch from the left top corner.  Connect the right bottom corner to the mark 1 inch from the right top corner.

Step 3:  Your template should be marked in this way, if it does not look like this picture start your template over. Cut along the marked lines to complete the making of your template for this project.
Using your template: 

Step 4:  From your charm pack or precut fabrics (cut into 5 in. X 5 in. squares) choose 1-4 squares stacked.  Placing the template on the squares, line your ruler up on the edge.  Careful not to cut the template, use the rotary cutter to cut through the fabrics.  Repeat this step on the other side.

Step 4b:  This is what your cut charm squares or mixed prints should look like.

Step 5:  To cut your pieces from the solid or small print fabric for the main print in this quilt You must first prepare the fabric.  Iron your fabric so that the salvage edges meet, then take the center fold to the salvage edges, iron it again.  This will make it easier to fit your fabric on a cutting mat and allow you to cut multiple pieces at once.  Once you have cut 5 inch wide strips from the quartered fabric, use your template and ruler alternately as pictured here to cut your pieces.  You will need 40 pieces cut from the fabric to complete this project.
Step 6:  Starting with a "mixed print" tumbler piece alternate blocks until you have 9 rows with 9 blocks each for a total of 41 "mixed prints" blocks and 40 "main print/solid" blocks.  The important step is to get the blocks down; you can then take time to rearrange to suit your liking.
Construction of Rows:

Step 7:  With right sides together you line up the sides of the blocks, making sure that they do not overlap on the ends.  Iron all seams towards the "main print/solid."  You can sew several pairs together one right after the other, snip threads between pairs and iron without having to stop and start after each pair.  It is sort of like a factory's assembly line.  This will cut some time off your project!

Step 8:  With rights sides together, aline the pairs so they can be sewn together.  Continue this until the whole row is complete.  Move onto the next row until you have 9 complete rows.

Step 9:  Now it is time to connect the rows together!  With right sides together, pin in place the two rows, if you have ironed all seams to the "main print/solid" the rows should nest into one another.  Even so, it is wise to pin them together so they do not shift in the sewing process.

Step 9b:  This is what your quilt top should look like once you have assembled all 9 rows together.

Step 10:  Folding the quilt top in half with the flat ends together, lay it on your cutting mat.  Place you ruler where each narrow part of the tumbler meets.

Step 10b:  Using your rotary cutter, cut along the ruler to form a straight edge.  Repeat this on the other side of the existing quilt top.

Step 11:  Prepare your sashing and binding fabrics as described in Step 5 of this tutorial.  For the sashing fabric you will want to cut 4 pieces of fabric measuring 5 in. X WOF (Width Of Fabric)

Step 11b:  This would be a great time to also cut your binding fabric.  I will explain the different binding cuts and techniques in "Finishing a Quilt Tutorial" that I will work on next.

Step 12:  First, trim the salvage from one end of a sashing strip. It is very important that you attach the sashing to the longer side first!  With right sides, pin the long side to a sashing strip; pinning will help the seams to stay put while attaching.

Step 12b:  There will be a little bit of excess fabric on the end.  You can use a rotary cutter or a pair of scissors to trim this off, just make sure it is straight.  Iron the seams towards the sashing.

Step 12c:  This is what your quilt top will look like after you have attached the sashing to the two longer sides.

Step 13:  Attaching the sashing to the ends of the quilt top will repeat Steps 12a & 12b.    The reason for attaching the longer sides' sashing first is so that all the measurements and pieces form a quilt with a full back (for a regular sized piece of fabric).  If you would like a bigger quilt you can play around with the sizes and perhaps cut your sashing pieces vertically instead of horizontally.  You may need to cut and add blocks to your existing number if that is the direction you would like to go.  You may also need to make the quilt backing from several pieces; next week's tutorial will explain.

Completed:  One quilt top measuring about 41 in. X 50 1/2 In.

The neutral version in green, teal, light blue and a touch of Red

The feminine version in pinks, purples, lime green & peach

Print Friendly and PDF